
Since this was requested and no one has posted a write-up yet, I decided I would. This doesn't take that long, as long as you are pretty good at removing the mid-cowls/side fairings. After you remove them a few times, it's not that hard.
I have also listed torque values. If I missed any, someone please add them in.
1. Remove the mid-cowls/side fairings and upper inner covers-see this thread:
http://www.1000rr.net/forums/showthread.php?t=46051&highlight=ram+air
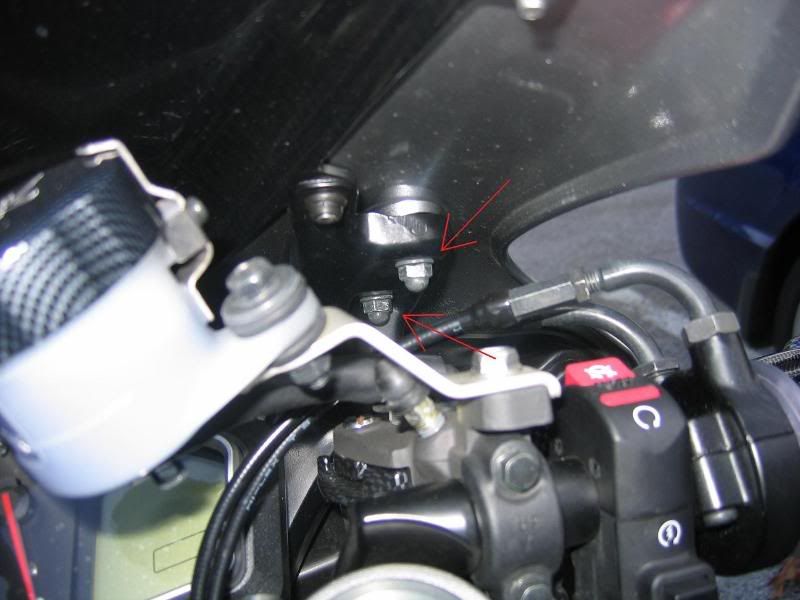
2. Remove rearview mirrors (pictures below are for the right side-procedure is the same for the left side)
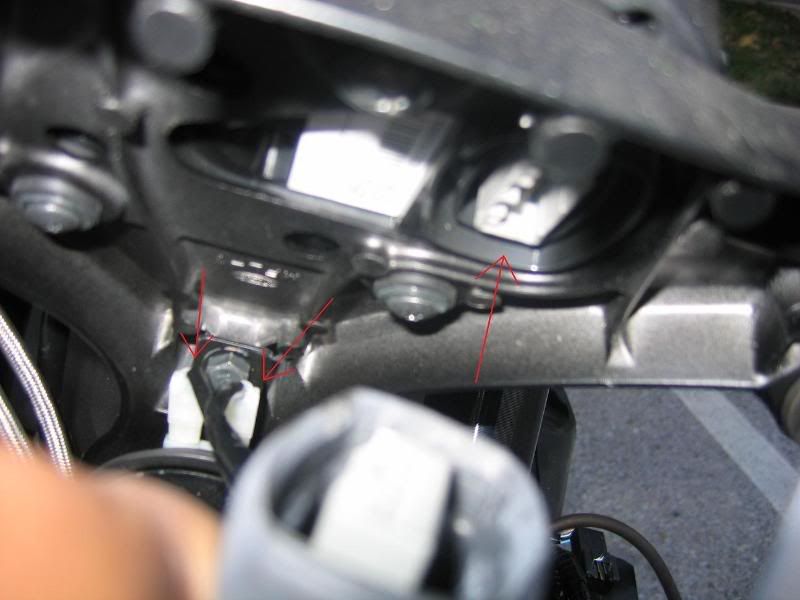
Pull down rubber/plastic boot (located between the upper cowl and upper stay behind the nuts) and disconnect the 2 connectors (red arrows)
![Image]()
Unbolt 2 10mm nuts-red arrows pointing to them (7 ft/lbs)
![Image]()
3. Remove windscreen
Remove 4 3mm bolts (1.1 ft/lbs) shown by red arrows
![Image]()
There are 2 tabs at the front of the cowl that go to the 2 front grommets in the stock windscreen that you will need to slide the windscreen off of. Or you can just break those 2 tabs off when you pull off the stock windscreen to replace it like I did. Don't know about other aftermarket windscreens, but the Puig I have doesn't even have those front 2 grommets, so I didn't care if I broke them or not.
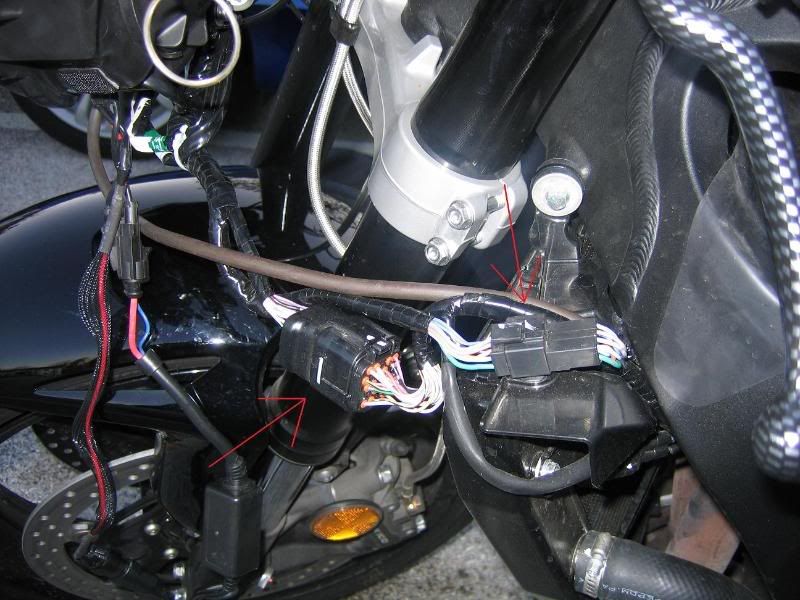
4. Disconnect sub harness 20P and 8P connectors-red arrows (left side of bike)
![Image]()
5. Disconnect vacuum hose from one-way valve
That's the ugly brownish-gray hose in the previous picture. Just yank it off from the one-way valve under the upper cowl
6. Remove upper cowl from frame grommets-pull the upper cowl forward
The next 2 connectors are the only thing holding the upper cowl to the bike now
7. Disconnect the horn connectors and the combination meter connector (tachometer/speedometer connector)-red arrows (the combination meter connector is already disconnected in this picture-it's covered with a boot which is the blurry thing in the foreground of the picture
![Image]()
Installation is the reverse of removal.
Hope this helps.
I have also listed torque values. If I missed any, someone please add them in.
1. Remove the mid-cowls/side fairings and upper inner covers-see this thread:
http://www.1000rr.net/forums/showthread.php?t=46051&highlight=ram+air
2. Remove rearview mirrors (pictures below are for the right side-procedure is the same for the left side)
Pull down rubber/plastic boot (located between the upper cowl and upper stay behind the nuts) and disconnect the 2 connectors (red arrows)

Unbolt 2 10mm nuts-red arrows pointing to them (7 ft/lbs)
3. Remove windscreen
Remove 4 3mm bolts (1.1 ft/lbs) shown by red arrows
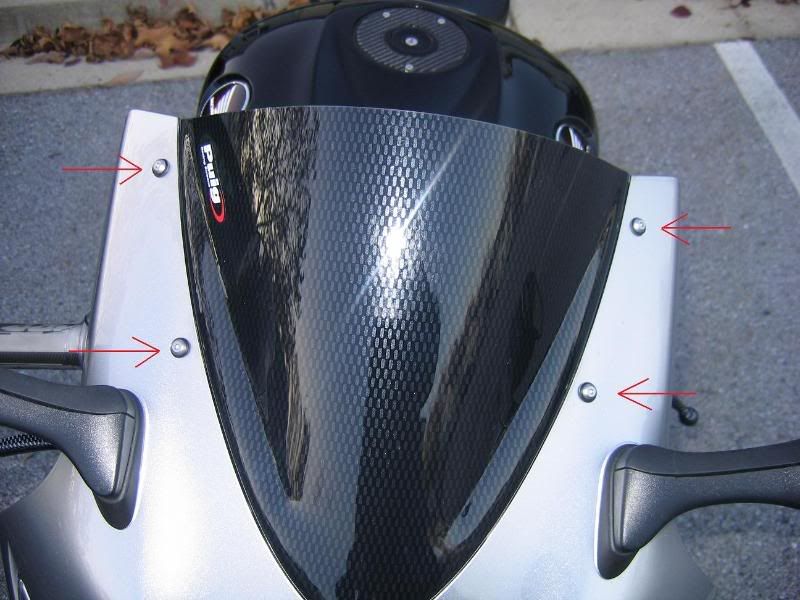
There are 2 tabs at the front of the cowl that go to the 2 front grommets in the stock windscreen that you will need to slide the windscreen off of. Or you can just break those 2 tabs off when you pull off the stock windscreen to replace it like I did. Don't know about other aftermarket windscreens, but the Puig I have doesn't even have those front 2 grommets, so I didn't care if I broke them or not.
4. Disconnect sub harness 20P and 8P connectors-red arrows (left side of bike)
5. Disconnect vacuum hose from one-way valve
That's the ugly brownish-gray hose in the previous picture. Just yank it off from the one-way valve under the upper cowl
6. Remove upper cowl from frame grommets-pull the upper cowl forward
The next 2 connectors are the only thing holding the upper cowl to the bike now
7. Disconnect the horn connectors and the combination meter connector (tachometer/speedometer connector)-red arrows (the combination meter connector is already disconnected in this picture-it's covered with a boot which is the blurry thing in the foreground of the picture
Installation is the reverse of removal.
Hope this helps.


